
1 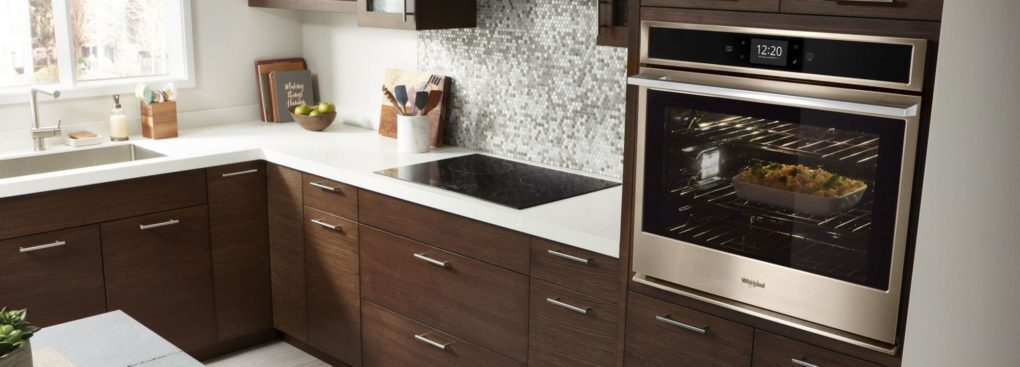
Installing a Wall oven confer many awesome benefits besides merely preparing your meals. They are compact, take limited space, and are durable enough to make use of for a longer duration of time. It is definitely in your best interest to know how to install a wall oven and make use of one on your premises.
We are here to help you with getting started. In our discussions here below, we shall look into the types of wall ovens. The various benefits that these Cooking Appliances bring about and the steps to follow for electric wall oven installation one in your home. It is our hope that you shall indeed receive the inspiration you need to move on.
Types Of Wall Ovens
Single Wall Ovens
As the name implies, the single oven comprises only one cooking zone much like that of a standard range. It is subsequently slimmer and takes up limited space compared to the other kinds of ovens. With it, you will be able to enjoy the benefit of maximized space and relative ease of accessibility.
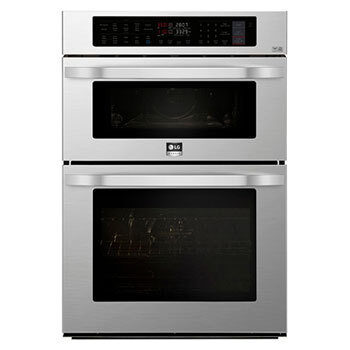
Double Wall Ovens
The double wall Oven Feature have two cooking zones that are embedded in one comprehensive packaging. They subsequently allow for greater cooking flexibility and freedom. Quite a number of them do have the ability to transmit heat via convection and broiling mechanisms. Owing to their possession of two cooking zones, these appliances take up larger spaces.
Microwave/Oven Combos
These bear many similarities to the double oven save for the fact that the one at the top operates Microwave Combination. Since they bring along two Cooking Time options for you, this kind of oven is more convenient to make use of. You, however, ought to possess some expertise to be able to manage it.
Triple Wall Ovens
The triple Wall Oven Combo combines the traits of a single wall oven with that of microwave and convection ovens. It also contains a warming drawer which goes a long way in saving your space needs not to mention doing your better roles. This is the kind of Wall Oven Microwave Combo to look up to if you are a seasoned cook.
Advantages Of Wall Ovens
Easy Access
Unlike the standard ovens, the wall ovens are fixed permanently at one portion or corner of countertop. In this way, they allow for easy access and use. You will not hence struggle too much to reach out to your oven when you need to. This means you will conclude your Cooking Needs sooner than you think.
Reduced Clutter
Generally speaking, wall ovens are slimmer and compact. They, therefore, reduce the clutter which other kinds of cooking apparatus ordinarily bring about. Thanks to this arrangement, the ovens let you walk freely and smoothly in your room. It also reduces those accidents which might usually arise in the course of use.
Higher Cooking Capacity
Compared to the standard ovens, wall ovens are larger and more spacious. They hence give off higher Power Levels cooking capacity to you. You will be able to prepare larger quantities of dishes using this set of the Home Appliance as compared to the other cooking gadgets. Your use of the gadget also cuts down the time you take.
Limited Space Requirements
Owing to their slim and compact sizes, the wall ovens demand limited mounting space on your part. You do not have to set aside too huge cooking and mounting space to be able to accommodate these kinds of ovens at all. This leaves you sufficient room to put up other equally important gadgets within your Existing Kitchen Space.
Simplifies the Cooking of Food
Many wall ovens incorporate a variety of cooking techniques and strategies in one. They hence give you the ability to handle many cooking chores in one convenient and comprehensive package. With this item at your fingertip, you will not have to shuffle between the many apparatus at a time to have your way.
To be able to a new electric wall Oven Installation, you require a couple of tools for the job. Below are the key tools which will prove handy to your rescue and use:
- Non-contact electrical tester
- Tape measure
- Reciprocating saw
- Screwdriver
- Junction box wire clamp
- Wire strippers
- Wire nuts
- Power drill with screw tip
- Drill bit, 1/8-inch
- Thread seal tape
- Adjustable wrench
- Liquid leak detector
How To Install A Wall Oven In a Base Cabinet
Having gathered the tools you need for the job, it is now time to embark on the Complete woven Installation exercise on its own. Follow these steps to bring the exercise to fruition:
#1 Turn off the Circuit Breaker
Start by turning off the circuit breaker. This is to spare you from the risks of electrocution and fire explosions. Though not a must, you are also advised to place some tape above the circuit breaker to ward off accidental contacts and the associated problems.
#2 Get rid of the Doors of the Old Oven
Move on now to get rid of the doors of the old Convection Oven. Do this by removing the anchoring screws after which you are to slide or lift the Existing Oven from the Kitchen Cabinet carefully. You may have to seek the assistance of another person to help with this one.
#3 Cut off any Electrical Links
Cut off the Electrical Junction Box which supply the power to the Convection Ovens. Find the electric junction box typically at the back of the cabinet. Use the wire strippers to do the job of severing the links. Be sure to note how this happens to aid with the re-assembly thereafter.
#4 Measure the Cabinet Space
Mark out the cabinet space thereafter. As you do this, compare the space with the dimensions that the new oven possesses. You may have to widen the space if the new Microwave Combination Oven is larger than the old one. This may yet again require expert assistance from a person who is well-versed in matters construction.
#5 Connect the Electrical Wires to the New Oven
Having prepared the cabinet slot for the new oven, you should now fix the electrical wires to the new oven. To do this, you have to place the new oven close to the cabinet slot. Go ahead thereafter to make the necessary electrical connections. As you do so, intertwine the oven-cable wires and the house wires. Secure them using a wire nut.
#6 Take care of the Wires
Having fixed the wires firmly, you now have to take care of them. Place those wires neatly inside the junction box. Put a new cover in place and then attach some right-angle cable bracket at the cover segment. This is the time to seal any openings you may have incised on a wall to prepare the cabinet slot.
#7 Slot the New Oven into the Cabinet
Finish off by slotting the new oven into the cabinet Counter Space. Lift and slide this new oven into the space to do this. Depending on the weight of the oven, you might need the assistance of another person more so with the screws. Fix the oven doors and other trimmings. Turn the circuit breaker on after you are through.
Cautions
As you go through this exercise, there are certain issues you will have to take of. Below are the cautions you will have to adhere to:
- Familiarize yourself with the local laws before starting off
- Never connect electrical devices to a live circuit
- Always turn off the circuit breaker
- Ascertain that the power is off by use of a non-contact electrical tester before setting out to work
- Look out for any leakages when preparing to work on a gas oven
Conclusion
At least you now know how to go about the issue of installing your wall oven. With the insight we have furnished, it is now up to you to practice and internalize the concepts. The best way to go about the issue is to conduct some mock installation. It is in this way that you will be able to master the concepts and undertake the exercise well.